Many of the changes Microsoft made in Windows 11 have rubbed long-time users the wrong way. And one of the most notable changes is the inability for both Windows 11 Home and Pro users to create an offline account during initial setup.
Instead, users are forced to sign in to, or create, a Microsoft account during the initial setup.
Fortunately, there’s a way around this requirement. Whether you genuinely don’t have Internet access on your machine, or you just want to tell Microsoft to take a hike, we’ll go over exactly how to install Windows 11 without a Microsoft account.
Unplug Your Ethernet Cord
Back in Windows 10, Microsoft tried to push users to sign up with a Microsoft account. But it still allowed users to create a local offline account.
However, Microsoft has decided against including this option, meaning you can’t just install Windows 11 without connecting to the Internet. In fact, if you try to disconnect your computer from the Internet before installing Windows 11, you’ll end up with a message telling you that you can’t continue.

Instead, you’ll need to leave your computer connected to the Internet until you reach the Microsoft account login page.

At this point, you’ll now want to disconnect your computer from the Internet, then click the back arrow in the top-left corner of the screen. This will then redirect you to the local account creation page, where you can proceed as normal with your Windows 11 installation.
Bypass the Out of Box Experience
Another workaround to installing Windows 11 without a Microsoft account is to bypass the Out of Box Experience.
To start, go through the setup until you reach the Let’s add your Microsoft account screen, and then bring up the command prompt by pressing Shift+F10.

In the command prompt, type oobe\bypassnro and press Enter. This will automatically restart the Windows 11 setup and bring you to an altered version of the setup.
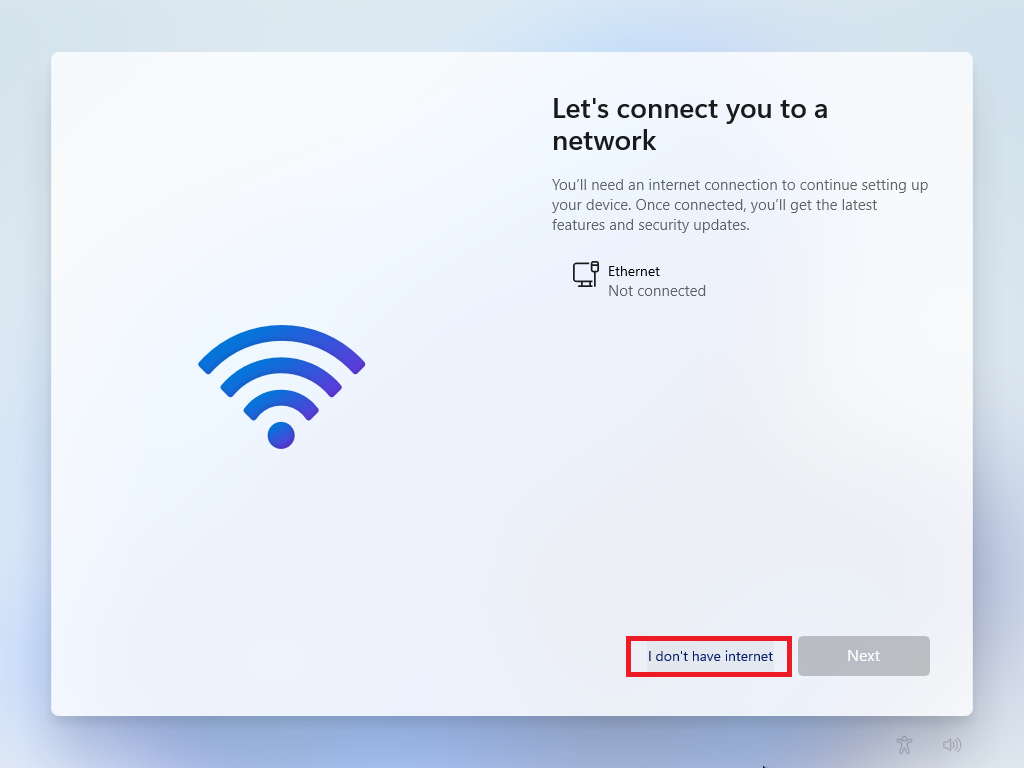
Now, disconnect your machine from the Internet and proceed through the setup as normal. Once you reach the part of the setup where it asks you to connect your computer to a network, you’ll see that the I don’t have internet option is now available. Click on that, and proceed through the rest of the setup as normal.
Release Your Computer’s IP Address
Another alternative to disconnecting your Internet partway into the installation process is to release your computer’s IP address. This will act similarly to unplugging your computer’s Ethernet cord right before you sign in to your Microsoft account.
On the Let’s add your Microsoft account page, press Shift+F10 to bring up the command prompt.
In the command prompt, type in ipconfig /release and press Enter. You can now close the command prompt.
Back on the Microsoft account screen, click the back arrow in the top-left corner of the screen, and you’ll be redirected to create a local account.
Use a Fake Microsoft Account
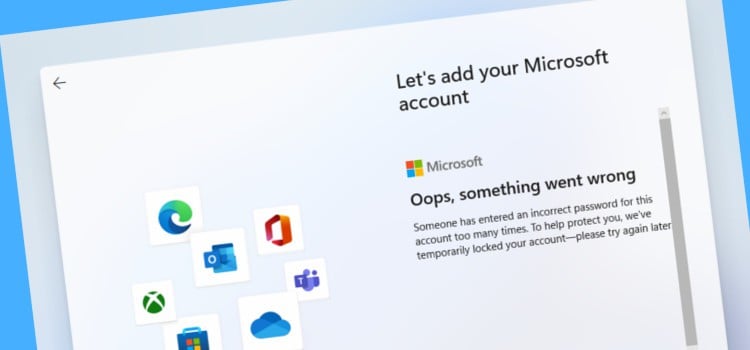
If everything else we’ve outlined is too technical and involved for your liking, there’s a dead-simple solution that doesn’t require you to touch your computer or open any other programs. The solution? Use a fake Microsoft account.
Strange as it may sound, Microsoft created the login process so that if you’ve entered the wrong login credentials enough times, it’ll temporarily lock your Microsoft account and let you proceed through the installation process with a local account. Even better—you don’t even need to use a valid email address to do this.
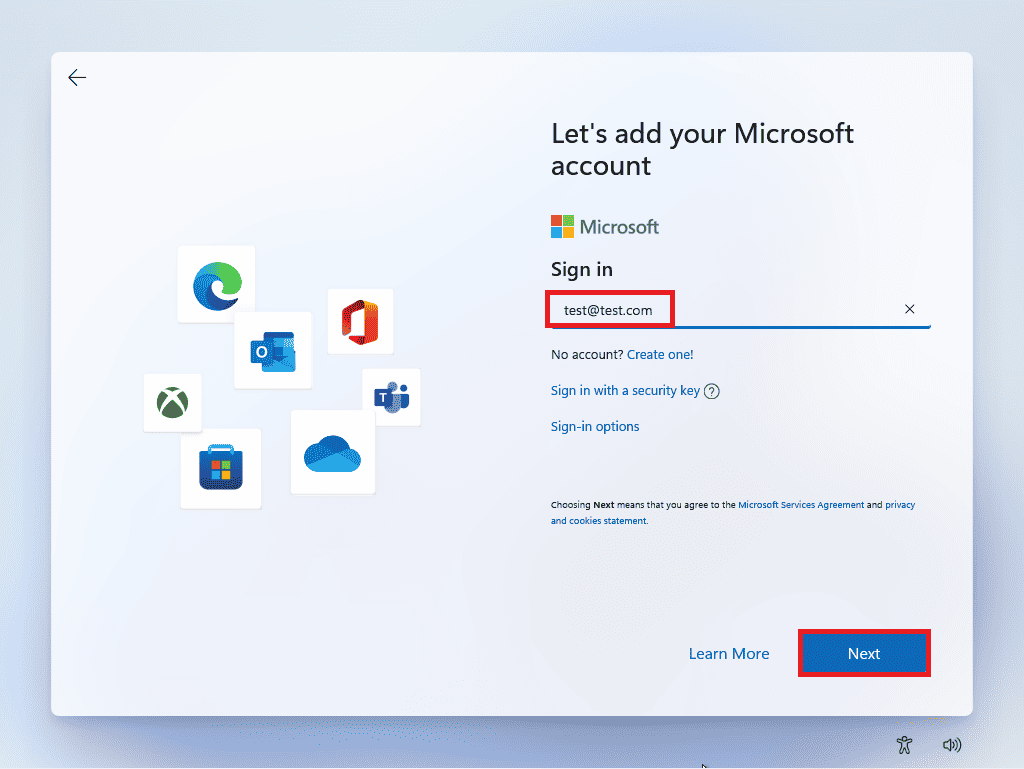
Simply enter any string of letters or numbers formatted as an email into the email field. To make it easy, we’ll provide an example. Type test@test.com as your email and press the Next button.

Then enter anything into the password field on the following page and click the Sign in button.
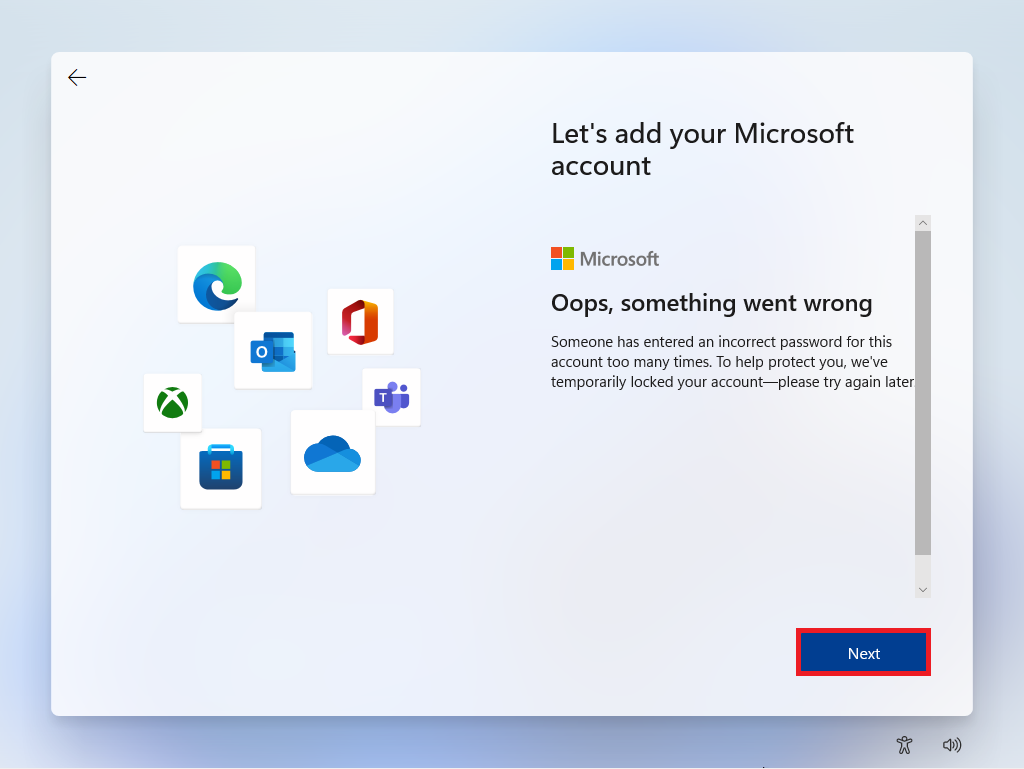
After trying to log in too many times with incorrect account details (using the example above, you should only need to do this once), the Windows 11 setup will inform you that the Microsoft account has been temporarily locked. Click the Next button to proceed with the installation.
From here, you can continue with the setup using a local account.