In this post, we’ve highlighted 31 of the most common PC building mistakes that first-time builders make. Knowing these mistakes will help you be better prepared to handle any issues that might arise during your upcoming build.
If you’re looking to build your first gaming computer, there is a lot you need to think about. From choosing components to assembling your new computer to installing (and uninstalling) programs and software once its up and running… there is a lot of work to be done!
And, while there are plenty of guides out there on how to build your own computer, there isn’t a lot of information on what not to do during your first build.
Also Read: How to Build A Gaming PC (Step-By-Step)
The truth is that there is so much going on and so many things to consider when you are building your first computer, that it is fairly common to see beginners make mistakes.
Usually, these mistakes aren’t the end of the world. However, if you aren’t careful you can do some serious damage to your PC.
In this post, I’ve compiled 31 common mistakes that first-time builders make when building their own PC so that you can know what not to do during your upcoming build. Sometimes, knowing the common mistakes and problems associated with a task are just as helpful as knowing the right procedures.
So, I’ve put this guide together to help give you some more insight on some potential pitfalls that you could potentially run into during your build, as well as how to avoid them.
11 Common Mistakes Made When Choosing Components
1. Buying A Cheap, Low-Quality Power Supply

If you’re brand new to building a computer, one of the most prevalent things you are going to hear is “Don’t choose a cheap power supply!” And, for the most part, this is very sound advice.
However, it should probably be noted that there are viable affordable power supplies on the market. But, whether or not they will work for you will depend on your budget and the components you are putting into your build.
If you’re working with a tight budget and are, therefore, limited to components that are less power-hungry, then you can get away with spending less on your power supply.
In fact, there are power supplies out there that cost under $40 that can power systems with budget-friendly graphics cards in them.
So, before you just jump into dropping a ton of money on your power supply make sure that that power supply actually pairs well with the components you’ve chosen.
Affordable Power Supplies Can Be Okay, But Avoid Low-Quality Options At All Cost
Now that we’ve gotten that out of the way and we’ve established that it is okay to use an affordable power supply in your build, it’s important to discuss that not all power supplies are created equal.
There are a handful of PSU manufacturers that are generally solid options. Units from companies like Seasonic, Corsair, EVGA, BeQuiet!, etc. are generally trustworthy.
And, there are also PSUs made by companies that should be avoided at all costs. PSUs built by manufacturers like Kentek, ARESGAME, Pystar, etc. are generally terrible options that should not see the inside of your computer case.
The worst part about these companies is not only that their power supplies are crappy, but also that they trick first-time builders into thinking their products are higher-quality than they really are.
Most first-time builders won’t take the time to learn more about how power supplies are rated and will only look at the listed wattage for the power supply. So, rather than picking out a quality 550W power supply, they might skip it over because they see that there is an 850W power supply available for half the price.
The problem is that that 850W power supply is a low-quality unit and probably has a real wattage rating of much lower than is listed. But because most beginners don’t know that they are being lied to, they will think that it’s a superior unit.
So, the bottom line is that you shouldn’t trust a power supply simply based off of its wattage rating alone. There are much better ways to pick out a quality power supply.
A Couple of Better Methods for Choosing A Power Supply
First off, the power supply you choose needs to accommodate all of the components in your build. So, before you begin looking for a new PSU, you should get a rough idea of how much power your components will need.
One way to do that is to use a PSU calculator like the one that OuterVision offers. It lets you input all of the components you are getting into its calculator and then it will tell you what the minimum wattage rating your PSU should have.
And, perhaps more importantly, it will tell you what your power supply’s +12v railing rating amperage needs to be.
The +12v rating is key as this is the railing where your most power-hungry component, your video card, will draw power from.
Once you know the minimum wattage and +12v rating you need to have, then you can start looking for a solid power supply to accommodate your components.
From there, I’d also recommend that you read up on some of the popular PSU review sites like HardwareSecrets.com. They run thorough testing on most popular units on the market and so if you are unsure whether or not the PSU you are considering getting is high-quality or not, you can check those sites to see if they have done a review on them.
You can also use our Power Supply Buyer’s Guide to help you narrow down the best options for the size of PSU you need.
Further Reading
- The Best Power Supplies
- What is A Modular Power Supply?
- Choosing the Right Power Supply (PSU)
- 80 PLUS Bronze vs Gold vs Platinum vs Titanium
2. Spending Too Much on Lower-Impact Components & Too Little on Important Components
While there are a lot of different components that are needed to build a computer, not all of them play as big of a role in the resulting performance as others. Of the components that make up your computer, your processor and video card (for gaming computers) are going to be the biggest determiners of how well your computer performs.
If you are building a gaming computer, your video card will be the most important component in your system.
Also Read: How Much Does Your CPU Affect FPS? & How Much Does RAM Affect FPS in Games?
And, then from there, other important components are your motherboard, memory, power supply, storages, etc.
However, what a lot of first-time builders do is they spend less than they should on the components that are going to dictate what kind of performance they will get and they overspend on components that don’t have a big impact on their system’s performance.
For instance, a new builder may go out and choose a $200 full tower computer case that looks cool and has fancy RGB lights despite the fact that they have $600 total to spend on their system. (This is an exaggerated example.) This mistake forces them to spend a lot less on their CPU and GPU and, as a result, their system’s performance will be much less than what it should have been.
Now, I’m not saying that you should skimp on everything but your CPU and your GPU, but just that you should seek to achieve some kind of balance between your components according to the impact those components will play on your system’s performance.
If you want some help with building a balanced part list, we update two different guides weekly that will give you a good place to start. They essentially give you ready-to-go part lists that are balanced and that can be used as-is, or modified to your liking.
Further Reading
- Budget Gaming PC Builds
- High-End Gaming PC Builds
- Parts Needed to Build A Gaming PC: Essential Hardware
- How Much Does it Cost to Build A PC Right Now?
- How Much is A Good Gaming PC?
3. Accidentally Choosing Components That Aren’t Compatible With Each Other
Another common mistake that first-time builders make is that they accidentally choose components that aren’t compatible with each other. They may choose an Intel processor and buy an AMD motherboard to go along with it.
Or, they might choose an Intel processor and pick out the wrong motherboard socket to pair it with. (For instance, an Intel Core i7-12700K CPU will only work in an LGA 1700 socket motherboard and so if you got an LGA 1200 motherboard, the two wouldn’t work together.)
They may also purchase DDR4 memory to go along with a motherboard that only takes DDR5 memory.
Also Read: DDR4 vs DDR5: Which Should You Choose?
And, of course, a lot of times, new builders will purchase components that physically won’t fit into the case they have chosen. Whether they accidentally purchased a graphics card that is too long for the case they bought or they picked a motherboard that is too large to fit in the case, if the components won’t fit in the case, your computer won’t work (unless, of course, you’re going to jerry-rig them or mod your case—which isn’t a good idea for first-time builders.)
So, before you purchase your components, you need to ensure that they will all work together!
Further Reading
- Tech Guided’s Computer Building Guide
- What is Bottlenecking?
- Example of Compatible Part Lists
- Which PC Case Size is Best for Your Next Build?
4. Pairing a CPU That Can Be OC’d w/a Motherboard That Doesn’t OC
This mistake doesn’t take too much to explain and, in the grand scheme of things, it doesn’t really hurt anyone. It’s just kind of a waste of money.
Essentially, what happens is that some first-time builders pair a processor that can be overclocked with a motherboard that does not allow overclocking.
And, since motherboards that allow overclocking are typically more expensive than motherboards that do not allow overclocking, pairing a non-overclockable CPU (or, a locked CPU) with an overclockable motherboard is a waste of money.
Intel Processors
This happens most often with Intel processors as they offer both locked (can’t be overclocked) and unlocked (can be overclocked) processors. The way to tell the two apart is by the ‘K’ that designates that the processor is unlocked.
For instance, an Intel Core i7-13700K can be overclocked while an Intel Core i7-13700 cannot.
And, the way to tell an Intel-based overclocking-friendly motherboard apart from a non-overclocking motherboard is by the ‘H’, ‘B’, or ‘Z’ that the chipset is named for.
For instance, a Z690 motherboard will let you overclock an unlocked processor, while an H610 motherboard is not overclocking-friendly. There are also ‘B’ designated motherboards and, like the ‘H’ motherboards, they do not accommodate overclocking as well. So, if you’re choosing an Intel processor, make sure you pick a ‘Z’ chipset motherboard (and an unlocked CPU) if you do want to overclock.
You can choose an overclockable motherboard to pair with a locked CPU if your goal is to upgrade to an unlocked CPU down the road. However, I don’t recommend the reverse (choosing an unlocked CPU to go with a motherboard that doesn’t allow for overclocking) simply because it is a much easier process to upgrade your CPU than it is to rip everything out of your computer, install a new motherboard, and hook everything back up.
So, before you purchase your components, make sure that—if you’re going with an Intel-based build—you aren’t pairing an unlocked CPU with a motherboard that doesn’t allow for overclocking.
AMD Processors
This isn’t as big of an issue with AMD processors and chipsets as almost all of AMD’s newer CPUs and chipsets accommodate overclocking.
However, AMD’s higher-end chipsets offer superior overclocking potential when compared to their more affordable chipsets.
Or, in other words, if you want an AMD-based system, and you want to achieve extreme overclocks, you’re going to want to pair an extreme AMD CPU (Ryzen 9 or Ryzen 7) with an extreme AMD chipset (X570.)
If you’re just looking to hit mild overclocks (or you just want the option to be able to OC later down the road), you can manage with a B550 chipset motherboard.
The bottom line, though, is that you need to make sure that—if you want to overclock your CPU—you are pairing a CPU and motherboard (and, for that matter, the proper CPU cooling) that are both designed to achieve the overclocks you are looking to get.
- Best Motherboards for Gaming PCs
- How to Choose A Motherboard
- Are Unlocked “K” CPUs Worth it for Gaming?
- Intel K vs KF: What’s the Difference?
5. Choosing a Graphics Card That is Too Powerful or Too Weak for Your Monitor
I see this mistake quite a bit. Basically, what happens is a first-time builder either buys a high-end video card and pairs it with a cheap 1080p monitor, or they buy a mid-range (or lower) video card and pair it with a 1440p, 4K, or high refresh rate monitor.
Both of these are big mistakes that at best will waste you a ton of money and at worst, will leave you with lower framerates than you should be getting.
Let me explain…
High-End Video Card With A Cheap Monitor
In the best case scenario, you buy a high-end video card like an RTX 4070, 4080, or 4090 and you pair it with a cheap 1080p 60Hz monitor. In this case, the GPU is severely underutilized and you could have gotten similar in-game performance if, instead of going with a high-end card, you went with a budget-friendly card like an RX 7600, or an RTX 3060 (or even lower). The difference in cost between those two tiers of graphics card is pretty significant.
Rather, if you are going to go with a high-end video card, make sure that you are pairing it with a high-end monitor (whether that’s a 1080p 360Hz monitor, a 1440p 240Hz monitor, or a 4K 144Hz monitor.)
Of course, the exception to this mistake is if you have plans to upgrade your monitor in the future. So, if you have plans to grab a high-end monitor in the near future, then you can use a cheap monitor with your high-end video card for the time-being.
Cheap Video Card With A High-End Monitor
Pairing a high-end monitor with a cheap video card is definitely worse than the example above because in this case, you will actually hurt your in-game performance. This is because a higher-end monitor takes more GPU power to run properly. The better the monitor, the lower your framerate will be.
So, while a cheap video card like an RX 7600 may be able to run a lot of today’s top games at 1080p with acceptable framerates, if you try and push those same games with an RX 7600 on a 1440P monitor or a 4K monitor, those same games might not even be playable.
Quite obviously, the easiest way to avoid this issue is to achieve a balance between your video card and your monitor. If you choose a high-end video card like an RTX 4090 or 4080, then pair it with a 1440p/144Hz monitor or a 4K monitor.
If you’re going with a budget-friendly card like an RTX 3060 or RX 7600, pair it with an affordable 1080p monitor. You can also use the buyer’s guides below to help you get a better idea of what parts to pair with each other.
Further Reading
6. Failing to Note What Ports the Monitor and GPU Have
This isn’t a very costly mistake, but failing to choose a video card and monitor that have the same offering of ports (DisplayPort, HDMI, DVI) is an inconvenience that could force you to have to pay extra for adapters to get them to work together properly.
Today, this mistake is pretty rare and really not likely to happen with anyone building a single monitor setup. This is because pretty much every modern GPU comes with one of each of a DisplayPort, HDMI port, and—to a lesser extent now—a DVI port.
Where I see the mistake happen most often is with users who want to put together a triple monitor setup. And, again, this is a pretty rare mistake with modern GPUs and monitors having all of the necessary ports, but it can happen in certain scenarios.
For instance, some monitors still only offer a DVI port. And, since, in order to set up triple monitors correctly, you need to connect at least one of the monitors to a DisplayPort, if you get a video card that has 1 x HDMI port, 1 x DVI port, and 1 x DisplayPort, you will end up not being able to get everything working properly.
Of course, it doesn’t mean you won’t be able to get it work, it just means that you’ll have to go out and get an adapter (in the case above, you’ll need an active DVI-to-DisplayPort adapter anyways) or a DVI-to-HDMI cable to get it working properly.
So, the main takeaway here is to A) be aware of the ports available on the monitor and GPU you are getting, and B) ensure that you have the right cables to pair with your monitor and GPU. Again, this problem is very rare nowadays and really only happens in certain instances where the user is setting up triple monitors, but it is still something to look at and consider before you finalize choosing all of your components.
7. Choosing A Knock-Off Brand to Save Money
For the most part, this mistake plays a lot into the same mistake of choosing a cheap power supply. There are probably more “knock-off” brands in the power supply market than in any other component market.
However, the advice still holds true…
If the brand isn’t well-known and it doesn’t have an established history of being reliable, it’s a good idea to avoid it. And, as I said above, while knock-off brands are most prevalent among the power supply market, you’ll also want to avoid knock-off brands for your SSD, monitor, CPU cooler, etc.
It’s not that a no-name brand can’t product quality components, it’s just that for the amount of money you are going to spend on your PC, and how important your PC is to your every day life, there’s no reason to take chances when there are proven manufacturers out there who will stand by their products.
So, bottom line… don’t choose cheap products from no-name brands who don’t have an established reputation.
8. Forgetting to Get A Copy of Windows
Aside from ensuring that you have all the right components and that they all are compatible with each other, you need to make sure that you have an operating system to go with your parts. You can assemble your computer, but without an operating system it won’t do much.
You really only have two options for your operating system: Windows and Linux.
And, for gaming, the only real option is Windows. Linux can work if you are only planning on playing certain games, but if you don’t want to be limited, you need a copy of Windows.
While this is another mistake that is fairly rare (thanks to the fact that there is so much good information on how to build a PC out there) it does happen. When it does happen it isn’t the end of the world because you can go out and get a copy of Windows.
But when you put together your new build and all you want to do is get it up and running so you can start gaming, the last thing you want to do is have to delay that experience because you forgot to get a copy of Windows from the start.
Can You Get Windows for Free?
Technically you can install Windows on your new PC for free without activating it with virtually no downside. You can download Windows onto a USB drive directly from Microsoft (here), install it onto your new PC, and just skip the activation part.
You will miss out on a few customization options and there will be a watermark on the bottom right-hand corner of your screen that says “Activate Windows.” But, other than that, you get access to Windows for free.
You could also get a cheap Windows activation code from sites like Kinguin.net or G2A.com. However, there is a question on whether or not purchasing a Windows activation code from such a site is a legitimate/honest way to do so.
9. Case Has USB 3.0 Ports, Motherboard Lacks USB 3.0 Headers
If you’re building a budget-friendly PC, one thing you might want to make note of is whether or not both your case and your motherboard have the necessary USB 3.0 connections.
A lot of times, first-time builders will get a case that has USB 3.0 ports on the front of it, but then they get a motherboard that doesn’t have a USB 3.0 header. Basically, this means that those USB 3.0 ports on the front of their case are useless.
The only solution then—aside from returning your motherboard and getting a new one—is to get a USB 3.0 to USB 2.0 adapter. In that instance, your USB 3.0 ports will operate as USB 2.0 ports. It’s not the end of the world, but it’s something that could have been avoided if the builder would have been aware that some motherboards don’t come with USB 3.0 headers.
The reverse of this (getting a motherboard with USB 3.0 header and a case with no USB 3.0 ports on the front) because the motherboard will likely still have a USB 2.0 header.
If you’re spending more on your components, this mistake is much less likely to happen as higher end motherboards and cases should both have USB 3.0 compatibility. But, it’s definitely something to consider, just to be safe.
This problem isn’t as prevalent now as it was in the past because pretty much all new motherboards and cases are going to come with USB 3.0 headers and ports. If you’re shopping on the second-hand market to save as much money as possible, though, this is something to take into consideration.
10. Failing to Get a Motherboard Speaker
There’s a chance that when you are building your PC that you will run into an issue. And, perhaps the most frustrating thing about running into an issue while building a PC is the fact that it isn’t always obvious what the problem is.
Fortunately, a lot of problems can be discovered through the help of a motherboard speaker. A motherboard speaker plugs into your motherboard and beeps out a series of codes (which can be found in your motherboard’s manual) that let you know what kind of problem there is with your build.
However, if you get a case that doesn’t come with a motherboard speaker, you will cut yourself off from the kind of valuable information it can provide.
A lot of cases do come with a motherboard speaker (don’t ask me why they come with the case and not the motherboard), but not all of them do. And, so, sometimes a first-time builder has a common problem with their build, but because they have no motherboard speaker to point out what that problem is, they have to spend more time than necessary to diagnose that problem.
So, it’s a good idea to ensure that the case you are getting comes with a motherboard speaker and if it doesn’t come with one, make sure you purchase one separately.
11. Spending a Ton on Components, But Keeping Same Bad Internet
This mistake should be readily known, but it surprises me how many times I see builders drop thousands of dollars on their PCs, but they stick with a slow internet connection that is going to render their new badass computer’s performance while playing online games.
This isn’t a mistake that takes much explaining. But I wanted to point out that if you are going to spend a lot of money on your computer, you need to make sure that you are also paying for an internet connection that won’t hinder your in-game experience (at least, in online-scenarios.)
If you need to upgrade your internet connection, check out our guide What is A Good Internet Speed for Gaming?
16 Errors First-Time Builders Make When Building Their PC
1. Not Building on a Large Clear Space
The very first thing you want to do when you get all of your components ready to be assembled, is to find a large clear space that you can work on. A large table or desk are ideal.
While you can build your system in a smaller and more compact area, there are a lot of components, cables, and screws that you’ll want to keep track of and having a larger space will help you stay more organized.
So, although this isn’t a detrimental mistake to the building process, having a large open space can definitely make the process much easier.
The other thing that you want to avoid is building on surfaces where there is a lot of potential for static electricity. This, of course, mostly means to avoid building on carpet surfaces. While rare, static electricity can cause major problems with your build. So, it is a good idea to avoid it.
I’ve never used static electricity wristbands, but they will mitigate the potential for damage to your new build via static electricity. They can be picked up for a few bucks on Amazon.
Further Reading
- Reddit: What kind of surface is best to build a PC on?
- Overclockers: When building my computer what surface should I work on?
- LinusTechTips: Do I need an anti-static wrist strap?
2. Failing to Have an Internet-Connected Device Handy
I know that it’s pretty rare these days to be out of hands reach away from an internet-connected device. However, I can’t stress how important it is to have some kind of access to the internet during your build.
First off, having the internet on hand will allow you to follow along with a computer building tutorial… whether that be a written step-by-step computer-building guide, or a video tutorial on YouTube.
Secondly, if you run into any problems during your build, you’re going to want to have access to Google. A lot of the times, beginners run into common problems that can easily be diagnosed and fixed if they can type the right query into Google.
The reason is that so many people have built their computers and so many of them have ran into problems, asked for help on forums, and gotten the answer they needed to proceed forward with their build. Now, with so many people getting answers to common building problems, you now have a huge glossary of solutions to those problems readily at your fingertips…
All you need is the internet to access them.
Further Reading
3. Disregarding Cable Management from the Onset
If you haven’t been around the system-building community for too long, you may not know how important cable management is to your computer. And, while the better cable management you are able to do in your new build the better, you don’t have to make your cable management look like the pros. It just has to be good enough.
Probably the biggest mistake first-time builders make when doing cable management, is simply disregarding it from the onset. A lot of times, first-time builders are so anxious to get their build going that they only focus on hooking everything up and getting it running.
However, by taking the time to become familiar with the cable management options your case comes with and planning out how you are going to route your cables prior to beginning your build, you’ll have a good head start on ensuring that you don’t end up with a rat’s nest.
In addition to that, it’s a good idea to spend some time looking at good examples of cable management and reading some solid cable management tutorials. That way you have a much better idea of your plan of attack going into your first build.
One thing that will help you in your quest to properly manage your cables is to get a modular power supply (Read our guide on the differences between modular power supplies and non-modular power supplies.) A modular or semi-modular power supply will help eliminate unnecessary cables and will make cable management much easier.
Further Reading
- 23 Examples of Good Cable Management to Inspire Your New PC Build
- The ultimate guide to proper PC cable management
- 5 essential cable management tips
4. Ignoring Component Manuals
It might sound like that last thing you’ll want to do, but since you are spending hundreds (if not thousands) of dollars on the components that will make up your new computer, it’s important that you are as familiar with the building process as possible.
And, one of the ways to do that is to read the manuals that come with your components.
Your motherboard’s manual is by far the most important of the bunch, but it is a good idea to go through each one so that you are familiar with the ins and outs of each component. For example, your motherboard’s manual will let you know which slots to put your RAM in and where (and how) you need to plug in your case’s front panel header.
Other manuals might show how to secure SSDs in larger drive bays or show you which cables go into which slots on your modular power supply.
The bottom line, though, is that by reading through your components’ manuals, you’ll help run into any mistakes that you could have otherwise avoided had you looked through them first.
5. Forgetting to Put I/O Shield On
Another common building mistake that first-timers make is that they forget to install their motherboard’s I/O shield on the back of their case before they put the motherboard in place.
The problem is that the I/O shield has to go on before the motherboard goes on, otherwise you won’t be able to get it on. And, so if you’ve gone through your whole build and have forgotten to put on the I/O shield, you’ll either have to take everything apart or unscrew your motherboard (and GPU if it’s secured to the case) and try to move it out of the way with everything still connected.
You can technically go without an I/O shield, but, it’s better to just install it correctly than to go with out.
So, be sure to install your I/O shield before you mount your motherboard into your case.
6. Failing to Install Motherboard Standoffs
Failing to install your motherboard’s standoffs can be catastrophic to your build. And, while it may seem silly, it does happen on occasion.
Also Read: What Are Motherboard Standoffs? How Do you Install Them?
Motherboard standoffs are made of brass and keep your motherboard from coming in contact with your case (which is made out of a conductive material), thus preventing your motherboard from shorting.
So, while it may seem like a small thing, it is crucial that you install your motherboard standoffs so that your new build doesn’t short and ruin your motherboard. The last thing you want to do with your brand new components is to ruin them and delay finishing your system.
7. Careless Handling of CPU & Other Components
While it may seem obvious, some first-time builders don’t understand how fragile their components are. While there are times when you need to apply some gentle pressure to get your components into place (like when you are seating your RAM), for the most part, you need to handle your components with care.
For starters, you need to be careful with your processor and it is highly recommended that you hold the CPU at the sides, rather than the top and bottom. For AMD CPUs, if you don’t handle them with care, the pins on the bottom of the processor can get bent and, if severe enough, will render your entire system useless.
You also want to take extra care when handling your motherboard and GPU as well, but you should really be careful throughout the entirety of the building process.
8. Applying Too Much or Too Little Thermal Paste
Thermal paste application is somewhat of an art. If you’re not careful, you can create a huge mess with it. And, if you don’t put enough, you can cause heating issues with your CPU.
Perhaps the easiest way to apply thermal paste is to place one drop of thermal paste (about the size of a grain of rice) on the middle of the back of the processor and when you install the heatsink on top of it, it will spread out.
This doesn’t completely cover the back of the CPU, which is okay, but if you are looking for a more thorough distribution of thermal paste, you can drop a dab or two of thermal paste and spread it out with a credit card or paste spreader to get a thin even coat that covers the majority of the back of the CPU.
However, using this method, just be sure that the layer is not too thick and that you leave a small gap at the edges of the back of the CPU. This is because when you install the heatsink and it presses down on the back of the CPU, the thermal paste on the back of it is going to get forced out to the edges. And, if you went right up to the edge with your thermal paste, it’s likely that it will spill over the edge when you install the heatsink.
Aside from those two methods, there are also a few others that work really well, including the cross, the single line, and the double line.
Further Reading
- What Does Thermal Paste Do?
- How Long Does Thermal Paste Last?
- How To Apply Thermal Paste
- Do CPUs Come with Thermal Paste?
- How to Clean Thermal Paste off your CPU
9. Installing RAM the Wrong Way
This is one of those really rare mistakes. It’s also one that most seasoned builders don’t believe can actually happen seeing as how modern RAM has a notch in it that makes it nearly impossible to install backwards.
However, there are quite a few cases of beginners actually getting their RAM to go into their motherboard backwards. (See here and here.)
So, while it may seem self-explanatory, it’s incredibly important that you line up the notch in your RAM with the corresponding ridge in your DIMM slots. And, while it does take some gentle pressure to get your RAM to click into place, it shouldn’t take such an effort that it feels like you are going to break your memory.
Ultimately, this mistake is an easy one to avoid, but you should definitely be aware of it so that you don’t accidentally force your RAM in backwards.
10. Not Installing Components Until They ‘Click’ In
Perhaps one of the most common mistakes that first-time builders make is that they don’t seat all of their components and cables in all the way. This is actually a fairly understandable mistake that beginners make because if you’ve never built a PC before, you don’t really have a feel for how much pressure is needed to insert components and cables into their slots.
However, the way you can tell if you have seated them properly is if you hear a clicking sound when you are inserting them. If you don’t hear a clicking sound, it’s likely that you have not pushed them in far enough.
And, what happens a lot of the time is that a new builder fails to push their components in all the way, then goes completely through the building process, tries to turn on their system, and either gets an error, or nothing happens.
That’s why when you read most troubleshooting guides, most all of them start off by having you reseat all of your components to make sure they are all fully installed.
So, if you’re building your first PC, make sure you take note of the fact that your components and cables need to be pushed in all the way until you hear a clicking sound.
11. Failing to Install Memory in Dual Channel Configuration
If you have a dual kit of memory, it has to be installed a certain way in order to activate dual-channel memory. Typically, your motherboard’s manual will tell you exactly how to install your RAM so that you are utilizing dual-channel memory.
And, the motherboard is typically color-coded to let you know which channels to put your RAM into.
As a word of note, typically the dual-channel slots are staggered on motherboards that have four DIMM slots. So, rather than putting both of your memory sticks in slots right next to each other, you stagger them and leave a slot between each one.
What new builders often do, though, is to install their dual memory sticks right next to each other, which prevents the RAM from being run in dual-channel mode and, as a result, you won’t get quite as much performance as you should.
Of course, in a micro-ATX or mini-ITX motherboard, there are only two DIMM slots. So if you have a micro-ATX or mini-ITX motherboard you don’t have to worry about which slots to install your two sticks of memory in.
So, before you install your memory, make sure you check your motherboards’ manual to ensure you are putting them into the right slots.
12. Forgetting to Plug All Cables In
This mistake is similar to failing to seat all your components fully. The result is the same: if you fail to plug in all of the cables in your build, your system won’t turn on
Whether it’s your CPU’s power cable, your GPU’s power cable, your monitor’s cable (into your GPU), or even the power cable that connects your power supply (and system) to the outlet in your house, you need to make sure everything is hooked up.
So, if you’ve just finished your new build and it isn’t turning on, your first step is to go back through your build and make sure everything is plugged in and seated correctly.
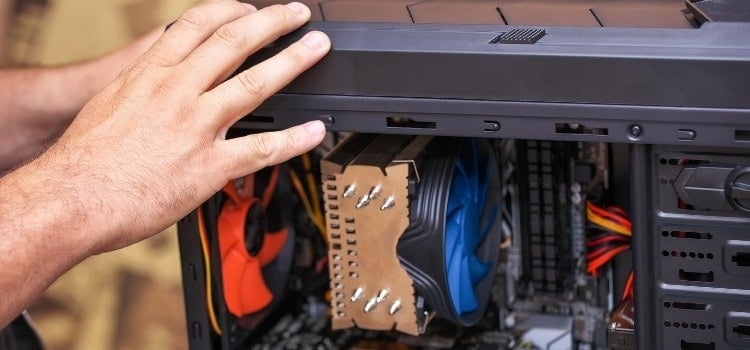
13. Installing Fans in the Wrong Direction
As far a cooling your system with fans goes, the goal is to move fresh air into one end of your case (typically the front) and exhaust the warm air inside of your case out the other end (typically the back).
In order for this to work, you have to have your fans pointed in the same direction (usually, towards the back.) If the fan in the front is pushing air towards the back, but the fan in the back is installed to push air towards the front, your system won’t be getting proper airflow and will see higher temperatures because of it.
This usually isn’t a problem if you are just using the fans that were provided with the case as they are typically installed correctly. However, if you are adding more fans, or upgrading your existing fans, it is important that you make sure you are setting them up in such a way that is conducive to creating ideal air flow within your case.
Further Reading
- ExtremeTech’s guide to air cooling your PC
- How to install (or replace) a case fan
- PC Cooling: How to Set up Computer Case Fans
14. Plugging Monitor Into the Motherboard Instead of the GPU
In running this website, I get a lot of emails from first-time builders who are stuck on a certain problem and need some help working through it. One of the more common problems I see is when first-time builders plug their monitors into their motherboard’s DVI or HDMI or DisplayPort, rather than the DVI, HDMI, or DisplayPort on their GPU.
When you plug your monitor into your motherboard, your computer will still boot up, but a lot of times, the screen won’t come on.

So, before you get ready to boot for the first time, and before you plug-in your monitor, be sure that you hook it up to your graphics card, rather than your motherboard. Typically, your graphics card’s ports will be lower than your motherboard’s ports (unless you have a case with a different layout).
15. Working on the Computer While It’s Turned On
One thing you definitely don’t want to do when you are building your computer is to start plugging things into it or working on it while it is turned on. This one doesn’t really need some long explanation, other than that you could seriously damage your components via static electricity or other means if you work on it while your system is turned off.
So, it’s necessary to turn your computer off when you need to troubleshoot, upgrade, or work on your computer.
16. Plugging Computer Into a Bad Outlet, or an Outlet on A Switch
If you want to talk about one of the most frustrating things that can go wrong during a new build, it’s when you setup everything correctly and nothing happens. Sometimes there are outside conditions which prevent your computer from turning on.
I’ve seen instances where beginners’ builds aren’t posting, only to find out after hours of troubleshooting that the wall socket they plugged it into was bad. Or, the wall socket they plugged it into was connected to a switch and that switch was turned off.
The worst part about these kinds of mistakes are that the first-time builder actually built everything correctly, but due to a failing outlet, or because they didn’t flip on the switch on the wall, they are stuck on a wild goose chase looking for a problem that doesn’t exist in their system.
So, always be sure to check the power outlet you are planning on testing your system on before hand. That way, you aren’t running around trying to fix non-existent problems when the solution is extremely simple.
4 Mistakes to Avoid Post-Build
1. Giving Up Before Troubleshooting
While I’d say that the majority of first-time builders are able to get through their first build fairly smoothly, there is a big chunk of them who run into some problems along the way. Now, there are two different types of problems you can run into when building a PC…
There are serious problems that you can’t solve immediately (i.e. a component arriving dead on arrival) and then there are minor snags that can easily be solved (i.e. you didn’t make sure that all your components were seated correctly.)
A lot of times, a new builder will go through the building process, try to boot up his computer for the first time, see that it doesn’t work, and conclude that one of the parts was dead-on-arrival.
I can’t tell you how many first-time builders I’ve talked to, or forum posts I’ve read, where the builder thinks that something is seriously wrong, only to find out the problem was very simple. Most of the time, the builder forgot to do something simple, like plugin the CPU power connector, or they didn’t seat the RAM properly, or they didn’t connect their GPU to the PCI-e power cable from their PSU.
And, honestly, it’s not a big deal! A lot of first-time builders make those kinds of mistakes (and so do veteran builders, too!)
The worst thing you can do, though, if your system doesn’t start up right away, is to give up and conclude that you are dealing with a dead component. Rather, your best bet is to first work through the steps in a new-build troubleshooting guide (see further reading) and if that doesn’t work, seek help from a popular forum.
Most of the time, working through a troubleshooting guide will help you solve your problem.
Further Reading
- Tom’s Hardware New PC Troubleshooting Guide
- Basic PC Build Troubleshooting Steps – PC Won’t Boot or Display Video
- PC Won’t Turn On – Troubleshooting
2. Not Checking the PC’s Temperatures After the Build is Complete
One common mistake that first-time builders make is that, after they have completed building their gaming PC, they don’t go into their motherboard’s BIOS and check and see what temperature their components are running at. It’s always a good idea to check and monitor your PC’s temperature as soon as possible as a component that is running too hot could be the sign of some serious problems.
Alternatively, after you install Windows and get into your PC for the first time, you can install a third-party temperature monitor like Core Temp, GPU Temp, Real Temp, HWMonitor, or HWiFo, and then check your component’s temperatures from there. In fact, it’s recommended that you install some temperature monitoring software and check it periodically so that you can be aware of any problems before they rise.
One thing I will point out that I noticed in a few instances as a PC repair tech, is that not all temperature monitor software are accurate. On a couple of occasions, I saw customers bring in their computer because their third-party temperature software was showing way too high of readings, only to find that the temperatures were fine, but the third-party software was off.
So, if you get high readings from your software, it would be a good idea to get a second opinion from either your BIOS, or another hardware monitor software.
Further Reading
- Safe CPU Temps: How Hot Should My CPU Be?
- The Best Tools to Stress Test Your PC
- Hardware Monitoring/Tweaking Software Guide
3. Not Knowing What Temperature Components Should Be At
Now, just monitoring the temperatures of your components isn’t enough. And, that’s because if you don’t know what temperature your components are supposed to be running at, then what difference does it make if you check them or not?
That’s why it is imperative that you know what temperature your components are supposed to be running at.
There are a few ways that you can accomplish this…
First, you can just go straight to the manufacturer’s website, find the product whose ideal temperature range you want to find, and check the specifications of what temperature it should be operating at. (Alternatively, you can just Google the product’s name and choose the result that takes you to the product’s page on the manufacturer’s website.)
You can also use a site like CPU-World.com if you’re looking for the ideal temperature of your processor as they keep all of that information for each processor.
And, perhaps the quickest option is just to Google “your product ideal temperature” and check some of the forum posts that pop up (or the manufacturer’s website if it pops up for the term.) Oftentimes other builders who have the same component as you are looking for the ideal temperature range for it as well, and they ask in forums for help seeking that information out. So, that can be a good way to get a quick answer—although, if you’re looking for a more concrete answer, trusting a random forum user to give you the right answer might not be the best option available.
Further Reading
- Safe CPU Temps: How Hot Should My CPU Be?
- Safe GPU Temperature Range: What is a Normal GPU Temp?
- Safe PC Temperatures as Fast As Possible
4. Not Updating Drivers After the Build is Complete
Once your computer is up and running and you are into your operating system and it can be pretty tempting to just start downloading games so that you can start playing them. However, before you do that you should update your motherboard’s and graphics card’s drivers.
Driver updates bring fixes and performance increases to your components and are necessary to keep your system running properly. And, while your motherboard and graphics card will probably come with a disc that has a driver update available on it, it is always a good idea to go directly to the manufacturer’s website and download the drivers from there.
This process doesn’t take too long and it will ensure that your system is as up-to-date as possible.
Further Reading
- How to Update Your Graphics Drivers
- How to Update Drivers in Windows 11
- What drivers do I generally need to install for a new PC?
- Do I Really Need to Update My Drivers?
Don’t Make These Common PC Building Mistakes
Look, mistakes happen. Sometimes, regardless of our preparation and planning, things go wrong. And, that’s okay.
However, being prepared is an important part of building a new PC. By being as familiar with the PC building process as possible, you will minimize the amount of mistakes you make (if not eliminate them completely) and reduce the risk that something doesn’t go wrong during your build.
So, while there is no guarantee that you won’t make a mistake during your upcoming build after reading this guide, there is a much better chance that you will avoid these common errors.