
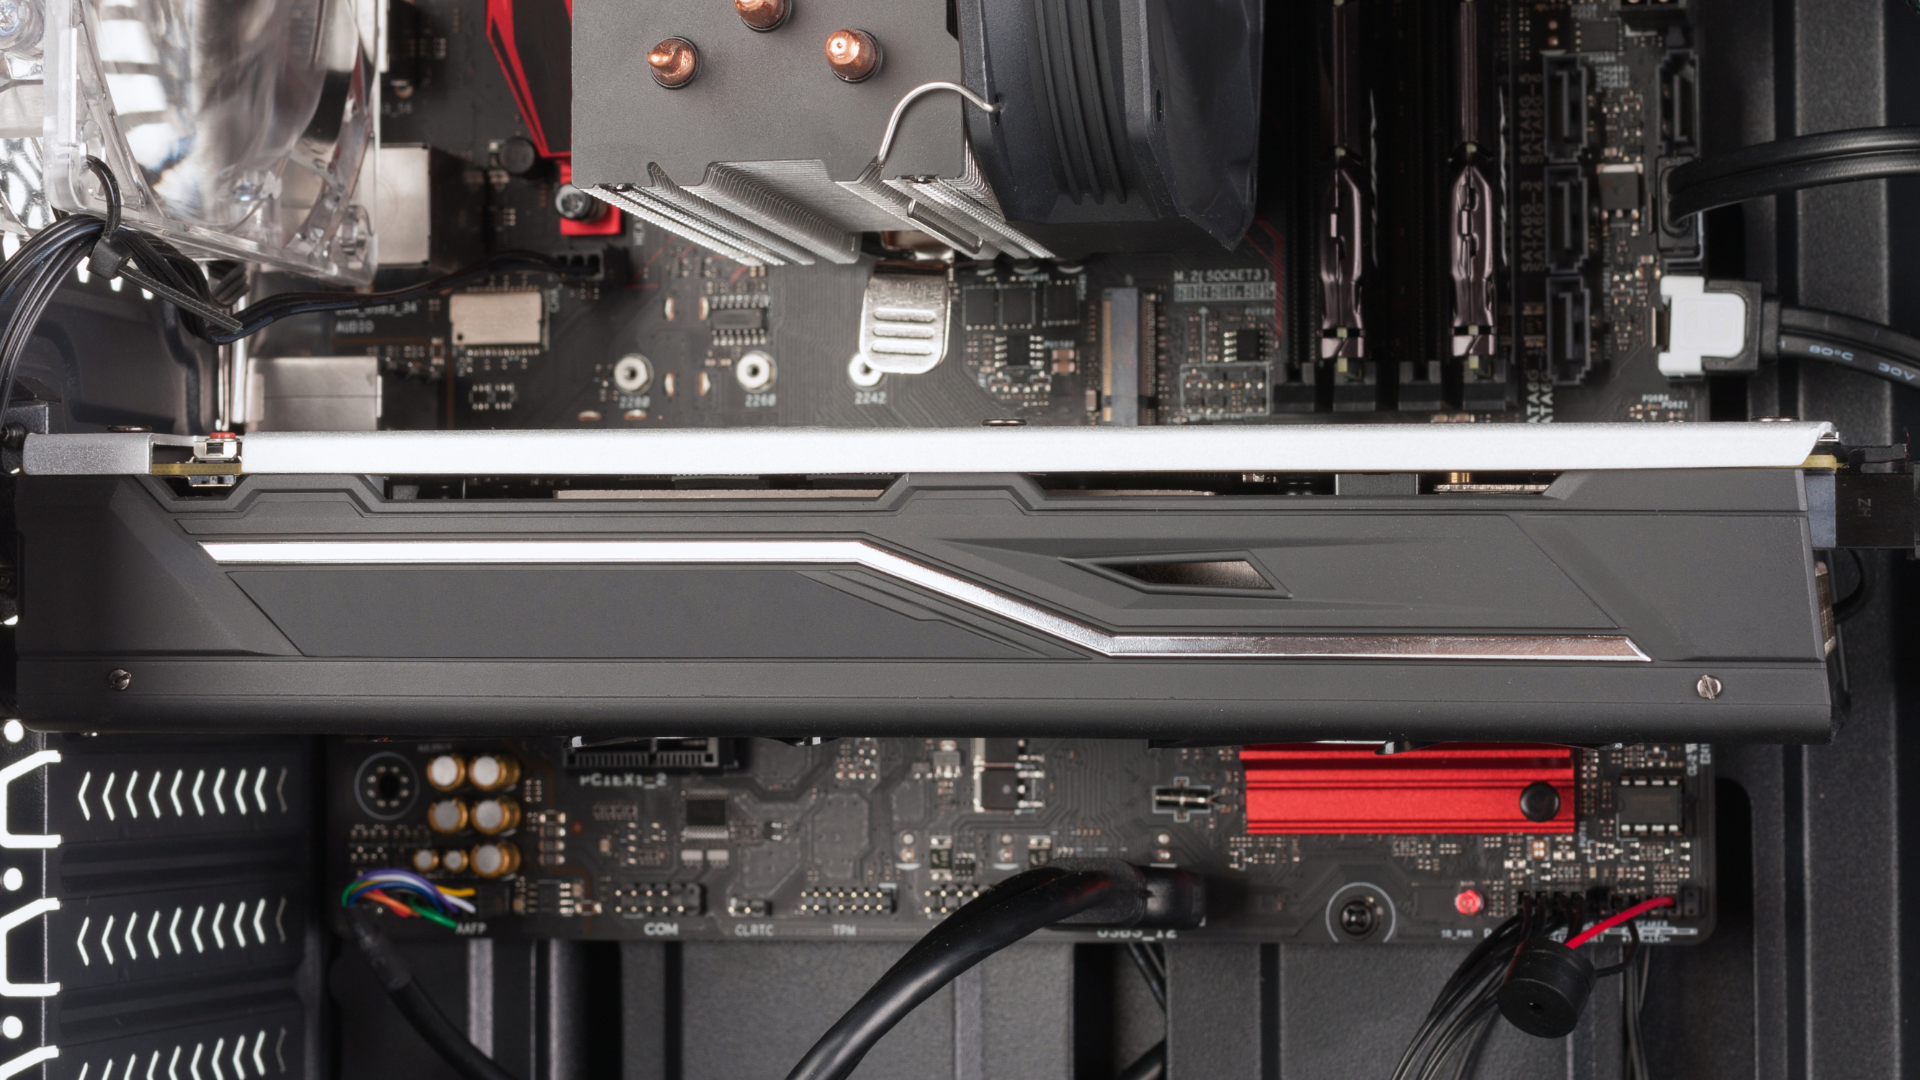
Overclocking your graphics card can squeeze a little more performance out of your gaming PC without requiring a hardware upgrade. A successful overclock can improve frame rates, smooth out performance dips, and help you get more from a high-refresh-rate monitor.
However, GPU overclocking is not as simple as moving every slider to the right. Each graphics card has different thermal, power, and frequency limits—even two cards of the exact same model may not overclock equally well.
In this guide, we’ll show you every practical way to overclock a modern GPU, including automatic tuning, manual overclocking, AMD and Intel’s built-in tools, and voltage-frequency curve tuning. We’ll also explain how to test stability, monitor temperatures, recover from crashes, and avoid the mistakes that can damage hardware or make your games less stable.
What Does Overclocking a GPU Do?
A graphics card contains two major components you can overclock:
- The GPU core, which performs graphics, compute, ray-tracing, and shader operations.
- The video memory, or VRAM, which stores and transfers textures, frame-buffer data, geometry, and other information used by the GPU.
Increasing the core clock allows the graphics processor to perform more work per second. Increasing the memory clock raises memory bandwidth, which may help in bandwidth-heavy games, high-resolution gaming, and certain productivity workloads.
Modern graphics cards do not normally operate at one fixed speed. They dynamically change their frequency according to workload, temperature, voltage, and available power. For example, NVIDIA GPU Boost continuously adjusts clock speeds according to the card’s available headroom.
As a result, adding a “+150MHz” core offset does not necessarily mean your GPU will always run exactly 150MHz above its advertised boost clock. The offset changes the card’s frequency behavior, while its boost algorithm continues responding to temperature, voltage, and power limits.
What Overclocking Does Not Do
Overclocking cannot:
- Give your graphics card more VRAM.
- Eliminate a CPU bottleneck.
- Fix a game with poor optimization.
- Overcome severe thermal throttling.
- Turn an entry-level GPU into a high-end one.
- Guarantee the same results achieved by another card.
If your game is limited by the CPU, frame-rate cap, game engine, or VRAM capacity, a GPU overclock may deliver little or no noticeable improvement.
Is GPU Overclocking Worth It?
Real-world gains are usually modest. A conservative overclock might improve performance by only a few percent, while a receptive card in a GPU-limited workload may get closer to a 5–10% improvement. Some cards have very little remaining headroom because the manufacturer already operates them close to their limits.
Whether that improvement is worthwhile depends on the tradeoff.
A higher overclock can result in:
- Higher frame rates.
- Better benchmark scores.
- More power consumption.
- Higher temperatures.
- More fan noise.
- Increased coil whine.
- Reduced stability.
- Potentially shorter component life.
The best daily overclock is not necessarily the highest number that completes one benchmark. It is the setting that provides a measurable performance improvement while remaining cool, quiet, and stable in everything you use.
Can You Overclock Any GPU?
Most desktop graphics cards allow at least some software tuning, but the available controls depend on the GPU, card firmware, driver, and computer manufacturer.
Desktop Graphics Cards
Most modern NVIDIA GeForce, AMD Radeon, and Intel Arc desktop cards support core, memory, power, or fan adjustments. Some settings may still be locked by the card’s firmware.
A factory-overclocked card can usually be tuned further, but it may have less remaining headroom than a card operating at reference specifications.
Gaming Laptops
Laptop GPU overclocking is more restricted. Manufacturers may lock voltage, power, memory, or fan controls, and the CPU and GPU frequently share the same cooling system.
A GPU overclock that looks thermally acceptable on its own can raise the laptop’s internal temperature and cause the CPU to throttle. For most laptop users, the manufacturer’s built-in Performance or Turbo mode is the better starting point.
Only overclock a laptop while it is plugged in, keep both CPU and GPU temperatures under observation, and use smaller adjustments than you would on a desktop.
Prebuilt and OEM Computers
Dell, HP, Lenovo, and other OEM systems may use customized graphics cards, restricted firmware, limited cooling, or power supplies with little additional headroom. Check the system manufacturer’s documentation before increasing the GPU power limit.
Integrated Graphics
Integrated GPUs can sometimes be overclocked through the motherboard firmware, AMD Ryzen Master, or an Intel platform utility. However, integrated graphics share power, cooling, and system memory with the CPU.
That makes iGPU overclocking a platform-level process rather than a standard graphics-card overclock. It should be approached with CPU, memory, and motherboard-specific guidance.
GPU Overclocking Risks and Precautions
Software overclocking is less dangerous than hardware modification because modern cards contain power, voltage, and thermal safeguards. Those protections reduce risk; they do not eliminate it.
An unstable or excessive overclock can cause:
- Game and application crashes.
- Display-driver resets.
- Black screens.
- Visual artifacts.
- System freezes or restarts.
- Lost unsaved work.
- Incorrect compute or rendering results.
- Additional heat and fan wear.
- Reduced component lifespan.
- Hardware damage in extreme cases.
Warranty coverage varies between GPU manufacturers, board partners, system builders, and regions. Damage caused by operating outside the product’s specifications may not be covered, even if the tuning option was available in the manufacturer’s software. Check the terms for your exact graphics card or computer.
Essential Safety Rules
Before changing anything:
- Save important work and close unnecessary programs.
- Make sure the PC is stable at stock settings.
- Use only one GPU tuning utility at a time.
- Download tuning software from its official source.
- Do not copy another person’s voltage or clock settings.
- Do not increase core voltage unless you understand the risks for your exact GPU.
- Do not bypass thermal or overcurrent protections.
- Never mix modular power-supply cables from different PSU models.
- Ensure every GPU power connector is fully inserted and wired according to the PSU and graphics-card instructions.
- Do not configure an untested overclock to load automatically with Windows.
- Stop immediately if you notice an unusual smell, electrical noise accompanied by instability, a non-spinning fan, or rapidly rising temperatures.
If your PC already crashes at stock settings, fix that problem before attempting an overclock. A failing power supply, unstable XMP/EXPO profile, bad driver, overheating component, or defective GPU can easily be mistaken for an unsuccessful overclock.
What You Need Before You Start
You need three types of software: a tuning utility, a monitoring utility, and something that can produce a repeatable GPU workload.
Tuning Options
| Method | Recommended Tool | Best For |
|---|---|---|
| Automatic NVIDIA tuning | NVIDIA App | Quick, low-effort tuning |
| Automatic or manual AMD tuning | AMD Software: Adrenalin Edition | Radeon owners who want a first-party tool |
| Intel Arc tuning | Intel Graphics Software | Supported Arc A-Series and B-Series cards |
| Cross-brand manual tuning | MSI Afterburner | Detailed core, memory, power, and fan control |
| Alternative manual tuning | ASUS GPU Tweak III | Presets, OC Scanner, and curve tuning |
| Advanced efficiency tuning | Voltage-frequency curve editor | Balancing clock speed, voltage, heat, and noise |
MSI Afterburner works with graphics cards from different manufacturers; you do not need an MSI card. MSI warns that fake Afterburner download sites have distributed malicious installers, so download it only from MSI or its official Guru3D distribution page.
ASUS GPU Tweak III is another capable option, especially for users who prefer its presets, monitoring interface, or voltage-frequency tuner.
Do not leave Afterburner, GPU Tweak, Adrenalin manual tuning, and another manufacturer utility fighting over the same settings. Pick one tool for active control.
Monitoring Software
Your tuning program may already display everything you need. At minimum, monitor:
- GPU core clock.
- Memory clock.
- GPU temperature.
- GPU hotspot or junction temperature, if available.
- Memory junction temperature, if available.
- Fan speed.
- GPU power.
- GPU utilization.
- Voltage.
- Performance-limit or throttling indicators.
Benchmarks and Stress Tests
Useful options include:
- A built-in benchmark from a game you regularly play.
- 3DMark.
- Unigine Superposition.
- OCCT.
- A demanding rendering or compute workload you actually use.
OCCT’s GPU and VRAM tests can detect certain rendering or memory errors, while a 3DMark Stress Test checks performance consistency across repeated loops.
No single benchmark can prove universal stability. The best testing process combines repeatable benchmarks, variable-load stress tests, and real games.
Understanding GPU Overclocking Controls
Before moving a slider, understand what it controls.
| Control | What It Does | Recommended Starting Approach |
|---|---|---|
| Core Clock | Adds a frequency offset to the GPU core | Increase in 15–30MHz steps |
| Memory Clock | Raises VRAM frequency or data rate | Increase in 50–100MHz steps |
| Power Limit | Raises or lowers the maximum permitted board power | Increase only if cooling and PSU capacity are adequate |
| Temperature Target | Influences boost and thermal-management behavior | Leave at the factory default initially |
| Core Voltage | Changes or expands voltage behavior | Leave at default for a first overclock |
| Fan Speed/Curve | Controls the relationship between temperature and fan speed | Adjust only as needed to control temperature |
| V/F Curve | Maps GPU frequencies to voltage points | Use for advanced overclocking or undervolting |
The Power Limit Is a Ceiling
Raising the power limit does not force the GPU to consume that amount of power constantly. It gives the boost algorithm permission to use additional power when a workload requires it.
However, a higher limit can increase heat, fan noise, PSU load, and transient power spikes. More power does not guarantee more performance if the GPU is limited by voltage, temperature, or the chip’s frequency capability.
The Temperature Target Is Not a Goal
Setting an 85°C temperature target does not mean 85°C is the temperature you should try to reach. It is part of the card’s boost and thermal-control behavior.
A cooler GPU may sustain a higher clock at the same settings. Raising the temperature target to avoid throttling is usually less effective than improving airflow, adjusting the fan curve, or using a more conservative overclock.
Leave Voltage Alone at First
Additional voltage can sometimes stabilize a higher frequency, but it also increases power and heat and may accelerate degradation. On modern cards, voltage controls may be restricted, expressed as a percentage, or constrained by firmware.
A strong daily overclock rarely requires a beginner to maximize the voltage slider. Find out what your card can do at its default voltage first.
How to Establish a Baseline
You cannot tell whether an overclock helped unless you know how the card performed before you changed it.
- Restore the GPU to its default settings.
- Restart the computer.
- Note the GPU model, driver version, room temperature, and fan configuration.
- Close background applications that could affect the result.
- Run the same benchmark three times with identical settings.
- Record the scores and use the middle result as your baseline.
- Record the maximum GPU core, hotspot, and memory temperatures.
- Record sustained clock speed, fan speed, and power consumption.
- Watch for existing artifacts, crashes, or throttling.
Use the same resolution, graphics preset, upscaling setting, ray-tracing setting, and benchmark path throughout the process. If you change the benchmark settings, you can no longer make a reliable comparison.
A successful overclock should improve the score or frame rate. A higher reported clock that produces the same or worse performance is not an improvement.
Method 1: Automatically Overclock Your GPU
Automatic tuning is the easiest place to start. The software scans the card, tests different frequency points, and creates a conservative tuning profile.
An automatic scan is still not a complete stability test. Validate the result in your own games afterward.
Automatically Overclock an NVIDIA GPU with NVIDIA App
NVIDIA App includes one-click tuning on supported GPUs.
- Install the latest stable NVIDIA driver and open NVIDIA App.
- Select System in the left-hand menu.
- Open the Performance tab.
- Close games and other GPU-heavy programs.
- Start or enable Automatic Tuning.
- Leave the computer idle while the scan runs.
- Wait for the scan to finish and record the resulting tuning value.
- Run your benchmark again.
- Test the result in several games.
According to NVIDIA’s automatic-tuning instructions, the scan normally takes approximately 10–20 minutes, and using the computer during the scan can affect its results.
The automatic tuner primarily optimizes the GPU’s frequency behavior. Do not assume it has also found the maximum stable memory overclock.
To undo the tune, return to the Performance panel and disable Automatic Tuning.
Automatically Overclock an AMD Radeon GPU
AMD Software: Adrenalin Edition provides separate automatic GPU and VRAM tuning options on supported cards.
- Open AMD Software: Adrenalin Edition.
- Search for Tuning and open Performance Tuning.
- If you have multiple GPUs, select the correct one.
- Find the GPU’s Automatic Tuning section.
- Select Overclock GPU.
- Read and accept the warning.
- Allow AMD Software to apply the result.
- Run the built-in stress test.
- Validate the settings with external benchmarks and games.
Some GPUs also offer Overclock VRAM and Undervolt GPU options. These are alternatives, and availability differs by card. AMD’s interface may allow only one automatic GPU tuning mode at a time.
AMD documents the available presets, manual controls, profile export, stress test, and reset function in its Adrenalin performance-tuning guide.
Use the reset-arrow button in the Tuning interface if you need to restore the defaults. AMD Software may also reset tuning settings automatically after a GPU-related crash or reboot.
Use OC Scanner in MSI Afterburner or GPU Tweak III
Supported NVIDIA cards can also use an OC Scanner through MSI Afterburner or ASUS GPU Tweak III.
In MSI Afterburner:
- Reset the card to default settings.
- Leave the voltage control at its default value.
- Open the Curve Editor or click the OC magnifying-glass icon.
- Open OC Scanner.
- Select Scan.
- Wait for the process to finish—it may take around 30 minutes.
- Apply the resulting curve.
- Save it to a profile.
- Run your own stability tests.
In GPU Tweak III:
- Open GPU Tweak III.
- Select OC Scanner.
- Leave the advanced voltage controls at their defaults.
- Start the scan.
- Save the resulting profile.
- Test it in benchmarks and games.
Do not run multiple automatic tuners and stack their results. Use one generated profile at a time.
Method 2: Manually Overclock with MSI Afterburner
Manual tuning takes longer, but it gives you more control and usually finds a better balance between performance, temperature, and noise.
The most important rule is to adjust one variable at a time.
Step 1: Configure Afterburner Safely
- Download and install MSI Afterburner from its official source.
- Open the program and click Reset.
- Open Settings.
- Make sure Apply overclocking at system startup is disabled.
- Leave Unlock Voltage Control disabled for your first overclock.
- Enable the monitoring values you want to track.
- Save the default settings as a profile if desired.
Keeping startup application disabled prevents an unstable setting from automatically loading every time Windows starts.
Step 2: Set the Power and Fan Controls
If your power supply and cooling are adequate, you can increase the Power Limit to the maximum value exposed by the card’s firmware. This is optional.
Leave the temperature target at its default unless you have model-specific information and a good reason to change it. If the power and temperature sliders are linked, make sure increasing the power limit has not raised the temperature target farther than you intend.
You can leave the fans on Auto initially. If temperatures increase significantly, create a slightly more aggressive fan curve instead of allowing the GPU to operate much hotter than it did at stock.
Do not change the core clock, memory clock, and voltage yet.
Step 3: Find the Core Clock Limit
- Set Memory Clock to 0.
- Increase Core Clock by 15–30MHz.
- Click Apply.
- Run a benchmark for approximately five minutes.
- Watch for artifacts, crashes, freezes, driver resets, or sudden clock drops.
- If the test passes, increase the core clock another 15–30MHz.
- Repeat until the benchmark becomes unstable or performance stops improving.
- Return to the last passing value.
- Reduce it by another 15–30MHz to create a stability margin.
- Save the result as a temporary core profile.
The highest setting that completes one benchmark is not necessarily stable. At this stage, you are only finding the approximate limit.
Step 4: Find the Memory Clock Limit
Test memory separately so you know which component caused an error.
- Write down your stable core setting.
- Return Core Clock to 0.
- Increase Memory Clock by 50–100MHz.
- Click Apply.
- Run the same benchmark.
- Compare the score as well as the image quality.
- Continue increasing memory in 50–100MHz steps.
- Stop if you see artifacts, encounter an error, or get a lower score.
- Return to the last successful value.
- Reduce it by an additional 50–100MHz for headroom.
Memory instability does not always produce obvious artifacts. Some memory errors lead to retries or performance loss, so an excessively high memory setting can benchmark slower while appearing visually normal.
Memory offsets are also displayed differently between utilities and GPU architectures. A “+1000MHz” result from someone else’s GPU is not a safe or meaningful target for yours.
Step 5: Combine the Core and Memory Overclocks
- Apply your conservative core setting.
- Apply your conservative memory setting.
- Run the benchmark again.
- Check whether the combined score improves.
- Monitor clock speed, power, temperature, and fan speed.
- If it crashes, reduce one setting at a time until you find the cause.
- Save the stable combination as a new profile.
A core setting and memory setting that pass separately may fail when combined because both compete for the card’s available power and thermal headroom.
Step 6: Perform Full Stability Testing
Once the combined overclock passes your short benchmark:
- Run a 30–60-minute looping benchmark or variable-load GPU test.
- Run a dedicated VRAM test.
- Play several games using different engines.
- Test ray tracing, upscaling, and frame generation if you use them.
- Test a lighter, high-frame-rate game as well as a demanding GPU-bound game.
- Run your normal rendering, encoding, AI, or compute workloads.
- Continue monitoring the card over several days.
If you encounter even one new unexplained crash, treat the overclock as unstable and reduce it.
Step 7: Enable Startup Application
Only after the overclock has survived extended testing should you configure Afterburner to load the profile with Windows.
Keep a stock profile and your stable overclock in separate slots. Recheck the overclock after major driver updates because a setting that was stable with one driver may not behave identically with another.
Method 3: Manually Overclock an AMD GPU with Adrenalin
Radeon owners can complete the entire process without installing a third-party tuning utility.
- Open AMD Software: Adrenalin Edition.
- Search for Tuning.
- Open Performance Tuning.
- Select the correct GPU.
- Change the tuning control to Custom.
- Accept AMD’s warning.
- Enable GPU Tuning.
- Enable Advanced Control, if available.
- Leave voltage on Automatic.
- Increase the maximum GPU frequency by approximately 15–30MHz.
- Apply the change and run a short test.
- Continue until instability appears.
- Return to the last passing frequency and reduce it by one step.
- Restore the GPU frequency to stock while finding the VRAM limit.
- Enable VRAM Tuning.
- Increase memory frequency in small steps, testing each adjustment.
- Combine the conservative GPU and VRAM values.
- Configure the fan curve or power limit only if needed.
- Run AMD’s stress test and your own extended tests.
- Export the finished profile.
Leave optional memory-timing presets such as Fast Timing at their defaults while finding the VRAM frequency limit. If you want to test a different timing preset, do it afterward as a separate variable.
Likewise, avoid moving the minimum GPU frequency close to the maximum frequency during your first attempt. That can increase power consumption or introduce instability at workloads where the GPU would normally reduce its clock.
AMD’s built-in stress test is useful for finding an immediately unstable setting, but a short successful result does not prove that the overclock is stable in every game.
Method 4: Overclock an Intel Arc GPU
Intel Arc tuning is now handled through Intel Graphics Software rather than the older Arc Control application. Intel says the newer application provides more detailed overclocking controls, although the available settings remain product- and driver-dependent. You can find the current feature overview in Intel’s Graphics Software FAQ.
On a supported Arc card:
- Install a current stable Intel graphics driver.
- Open Intel Graphics Software.
- Select Performance.
- Open the Tuning or Tuning (Beta) section.
- Select the correct Arc GPU.
- Restore the default settings.
- Leave the voltage setting at its default.
- Increase the frequency offset by approximately 15–25MHz.
- Apply the change.
- Run a short benchmark.
- Repeat until you encounter instability.
- Return to the last passing value and reduce it by one step.
- Test the VRAM frequency separately if the option is available.
- Increase the power limit only if cooling and PSU capacity are adequate.
- Validate the combined settings with benchmarks and games.
- Enable startup application only after extended testing.
Depending on the Arc model, Intel Graphics Software may provide frequency, voltage, power, thermal, fan, memory-speed, and voltage-frequency curve controls. Intel warns that changing clock frequency or voltage can reduce stability, damage components, or reduce their useful life.
If the Tuning tab is missing, update Intel Graphics Software and the graphics driver before attempting workarounds. Support has changed across driver releases, and not every Intel GPU exposes the same controls.
Method 5: Voltage-Frequency Curve Tuning
A traditional offset raises a broad portion of the GPU’s frequency curve. Voltage-frequency—or V/F—curve tuning gives you more control over the frequency the GPU targets at each voltage point.
This can be used in two ways:
- Raise frequency at a given voltage for a more targeted overclock.
- Maintain similar or higher performance at a lower voltage, reducing heat and power.
The second approach is often called undervolting, but a well-tuned undervolt can allow the GPU to sustain higher effective clocks because it encounters fewer power or thermal limits.
Basic V/F Curve Process
- Restore the card to stock settings.
- Run a repeatable workload and record the sustained frequency and voltage.
- Open the curve editor in your tuning utility. In MSI Afterburner, press Ctrl+F.
- Select a voltage point slightly below the GPU’s typical loaded voltage.
- Set that point to approximately the stock sustained frequency.
- Configure the higher-voltage points so they do not request a higher frequency, creating a plateau.
- Apply the curve.
- Test it with a short benchmark.
- If it is stable, increase the target frequency in approximately 15MHz steps or try the next lower voltage point.
- If it crashes, use a higher voltage point or lower the target clock.
- Complete the same extended stability tests used for a normal overclock.
Do not copy a curve from a different graphics card. Voltage behavior varies between GPU models, board designs, individual chips, drivers, and workloads.
Curve tuning takes more patience than moving an offset slider, but it can produce a better daily profile: similar or improved performance, lower temperatures, less fan noise, and reduced power consumption.
Why You Should Avoid GPU BIOS Flashing
Some advanced overclockers flash a different video BIOS, modify power tables, perform shunt modifications, or use soldered voltage controls to bypass a card’s normal restrictions.
These are not ordinary GPU overclocking methods.
A BIOS flash or hardware modification can:
- Brick the graphics card.
- Disable display output.
- Apply an incorrect memory configuration.
- Exceed the capabilities of the VRM or power connectors.
- Break fan or thermal controls.
- Prevent driver installation.
- Void warranty coverage.
- Require a hardware programmer to recover the card.
- Cause permanent damage.
Cards with the same GPU and cooler can still use different circuit boards, memory chips, or power configurations. A firmware file should never be considered compatible based on the model name or appearance alone.
A dual-BIOS switch can improve recovery options, but it does not make an incompatible flash safe. BIOS flashing, shunt modifications, liquid nitrogen cooling, and physical voltage modifications belong to competitive or experimental overclocking—not a normal daily gaming setup.
How to Test GPU Overclock Stability
A reliable stability process happens in stages.
Stage 1: Short Test After Every Change
Run a five-minute benchmark after each frequency adjustment. This catches immediately unstable settings without wasting time on a long test.
Watch for:
- Artifacts.
- Flickering.
- Colored flashes.
- Frozen frames.
- Driver resets.
- Crashes.
- Temperature spikes.
- Falling benchmark scores.
Stage 2: Extended GPU and VRAM Testing
Once you have a promising final setting, run:
- 30–60 minutes of a looping GPU benchmark.
- A variable-load GPU test.
- A dedicated VRAM test.
- A test that creates rapid changes in GPU load.
Variable loads matter because modern GPUs move across many voltage and frequency points. A setting can be stable at 100% load but fail when a game rapidly moves between menus, cutscenes, gameplay, and loading screens.
Stage 3: Test Several Real Games
Test at least three games if possible:
- A demanding rasterized game.
- A ray-traced game.
- A lighter game that runs at a high frame rate.
- The game that you play most often.
Play for at least 30–60 minutes per game. Use the settings you normally use, including ray tracing, upscaling, frame generation, mods, and uncapped frame rates where appropriate.
Stage 4: Test Your Real Workloads
If you use the GPU for video editing, 3D rendering, AI, scientific computing, or other paid work, validate those applications separately.
A tiny gaming performance improvement is not worth incorrect output, a failed overnight render, or lost work. For reliability-sensitive systems, use a larger stability margin or remain at stock settings.
What Counts as Stable?
A stable GPU overclock should produce:
- No visible artifacts.
- No detected GPU or VRAM errors.
- No application crashes.
- No driver resets.
- No black screens or restarts.
- Better performance than stock.
- Consistent clock speed.
- Acceptable temperature and fan noise.
- Reliable behavior after cold boots and extended use.
Passing one benchmark once does not count as stable.
How Hot Is Too Hot?
There is no universal safe temperature that applies to every GPU sensor and graphics-card model.
Different cards have different limits for:
- GPU core or edge temperature.
- GPU hotspot or junction temperature.
- GDDR memory junction temperature.
- Voltage-regulator temperature.
The hotspot is expected to read higher than the general GPU temperature because it reports the hottest measured region of the die. Memory temperature may be considerably different from both.
As a general observation, many desktop GPUs operate in approximately the 60–80°C core-temperature range under gaming loads. However, that is not a specification or a universal safety limit. A temperature in the low 80s may be permitted on one card while leaving very little boost headroom on another.
A better rule is to:
- Identify the official limit or default target for your exact GPU.
- Keep every sensor below its throttling threshold.
- Compare overclocked temperatures with your stock baseline.
- Avoid a large temperature increase for a tiny performance gain.
- Watch for sustained throttling or continually rising temperatures.
Ideally, a daily overclock should keep the GPU’s load temperature close to—or below—its stock baseline. If the card is significantly hotter and louder for a barely measurable gain, reduce the overclock or improve the cooling.
A hotspot that suddenly becomes much hotter relative to the core temperature can also indicate a cooler-contact or thermal-interface issue rather than a need for a faster fan curve.
Signs Your GPU Overclock Is Unstable
Different symptoms can point toward different settings, although they are not definitive.
| Symptom | Likely Cause |
|---|---|
| Game closes to the desktop | Core or memory clock too high |
| Driver stopped responding | Unstable core, memory, voltage, or power delivery |
| Sparkles, colored dots, or checkerboards | Often VRAM instability |
| Corrupted textures or geometry | Often VRAM instability |
| Black screen | Severe core/memory instability or power problem |
| System restarts or shuts down | PSU protection, excessive power, overheating, or severe instability |
| Benchmark score decreases | Memory errors, throttling, or power contention |
| Stable benchmark but one game crashes | The overclock is not stable for that workload |
| Clock falls as temperature rises | Thermal or power limiting |
| Stuttering or worse 1% lows | Marginal instability, throttling, or an overly aggressive curve |
Windows may reset the graphics driver after the GPU stops responding. Microsoft calls this process Timeout Detection and Recovery. A recovered desktop does not mean the overclock is acceptable—it means Windows successfully responded to a GPU hang.
Do not “fix” an unstable overclock by increasing the Windows TDR delay. That only postpones recovery and hides the symptom without correcting the unstable hardware setting.
How to Recover from a Bad Overclock
Most software overclocking failures can be reversed without permanent consequences.
If a Game or Benchmark Crashes
- Close the application.
- Open your tuning utility.
- Click Reset or load the stock profile.
- Reduce the last setting you changed.
- Restart the test.
If the Screen Goes Black
Wait briefly to see whether Windows recovers the driver. If it does not, press Windows key + Ctrl + Shift + B to request a graphics-driver reset. Microsoft documents this shortcut as a possible way to recover from display problems.
If the computer remains completely unresponsive, restart it and return the GPU to its default settings.
If an Unstable Profile Loads with Windows
- Boot Windows into Safe Mode.
- Disable or uninstall the tuning utility.
- Restart normally.
- Reinstall the utility if necessary.
- Confirm that startup application is disabled.
- Begin again from the default settings.
This is why you should not enable startup application until a profile has been fully tested.
If a Factory-Overclocked NVIDIA Card Is Crashing
NVIDIA’s Debug Mode forces a board-partner card to operate at NVIDIA reference clock speeds, which can help determine whether a factory or manual overclock is causing crashes.
In NVIDIA App, open System > Advanced and enable Debug Mode. NVIDIA provides more detail in its Debug Mode support article.
If the crashes continue at reference settings, investigate the driver, CPU, memory, power supply, cooling, and GPU hardware.
Frequently Asked Questions
Can overclocking damage a GPU?
Yes, although conservative software tuning carries less risk than adding voltage, flashing firmware, or modifying hardware. Excessive voltage, power, or temperature can damage a card or reduce its lifespan.
Built-in limits help protect modern GPUs, but they are not permission to use every slider at its maximum.
Does overclocking a GPU void its warranty?
It depends on the manufacturer, board partner, system builder, region, and cause of failure. Damage caused by operating outside the product’s specifications may be excluded from coverage. Check the warranty for your exact card or computer.
How much FPS will GPU overclocking add?
Often only a few percent. A strong result may approach a 5–10% improvement in a GPU-limited game, while a CPU-limited game may show almost no difference.
The gain also depends on whether the workload responds more to core frequency, memory bandwidth, or neither.
What is a safe GPU overclock?
There is no universal safe clock offset. A setting that works on one card may crash an identical model.
The safest practical approach is small adjustments, default voltage, careful temperature monitoring, extended testing, and a deliberate margin below the maximum benchmark-passing value.
Should I maximize the power limit?
Not automatically. A higher power limit can help a GPU maintain its boost frequency, but it also increases potential heat and PSU load.
If the GPU is not hitting its power limit, raising the slider may provide no benefit. If your cooling, connectors, or PSU are marginal, leave it at the default.
Should I increase GPU voltage?
Most users should not need to. Find the maximum stable frequency at the default voltage first.
Adding voltage can increase heat and power consumption quickly, and acceptable voltage behavior is specific to the GPU and firmware. Never copy a voltage recommendation intended for another card.
Should I overclock the core or memory first?
Test them separately. Find the core limit with memory at stock, then find the memory limit with the core at stock. Combine conservative versions of both settings afterward.
This makes troubleshooting much easier.
Why did a higher memory clock lower my score?
The memory may be making errors that cause data to be retried, or the card may be using additional power that would otherwise be available to the GPU core. Reduce the memory clock and retest.
Always judge a memory overclock by performance and stability, not just the reported frequency.
Why does my overclock pass benchmarks but crash in games?
Different workloads use different parts of the GPU and different points on its voltage-frequency curve. A benchmark cannot reproduce every game engine, API, ray-tracing workload, loading transition, or shader combination.
If a game repeatedly crashes with the overclock and does not crash at stock, the overclock is not stable for that game.
Will the overclock stay after restarting?
Only if the tuning software or driver is configured to reapply it. Keep automatic startup disabled until the overclock has passed extended testing.
Driver updates, crashes, and software updates may reset the profile.
Can undervolting and overclocking be combined?
Yes. You can configure the GPU to run at a higher frequency than stock at a given voltage—or maintain stock-like performance at a lower voltage.
This may reduce power, temperature, and noise while helping the GPU sustain its clock. It requires more careful curve tuning and stability testing than a basic offset.
Does overclocking shorten a GPU’s lifespan?
It can. Higher voltage, power, current, and temperature place additional stress on the GPU, memory, voltage regulators, fans, and power-delivery components.
A modest overclock at default voltage and controlled temperatures is less stressful than an aggressive voltage-heavy overclock, but the risk is never zero.
Is Overclocking Your GPU Worth It?
GPU overclocking can be worthwhile if you enjoy tuning hardware or want a small amount of extra performance without buying a new graphics card. Automatic tuning is the best starting point for most users, while manual tuning provides more control and may find a better result.
The key is to prioritize actual performance over large-looking clock numbers.
Work in small increments, tune the core and memory separately, leave voltage alone initially, and compare every result with a stock baseline. Once you find the limit, back away from it and thoroughly test the final profile.
A slightly slower overclock that works every day is far better than a benchmark-winning setting that crashes when you actually want to play a game.
